

Why UI Tests Need to Log In
Without a way to sign in, TestSprite can only explore and test what a signed-out visitor sees. You configure login once, and TestSprite signs in the same way for feature exploration, test generation, and every run.This page covers browser login for UI projects only. For API projects, see Auto-Auth.
Getting Started: Sign-in required
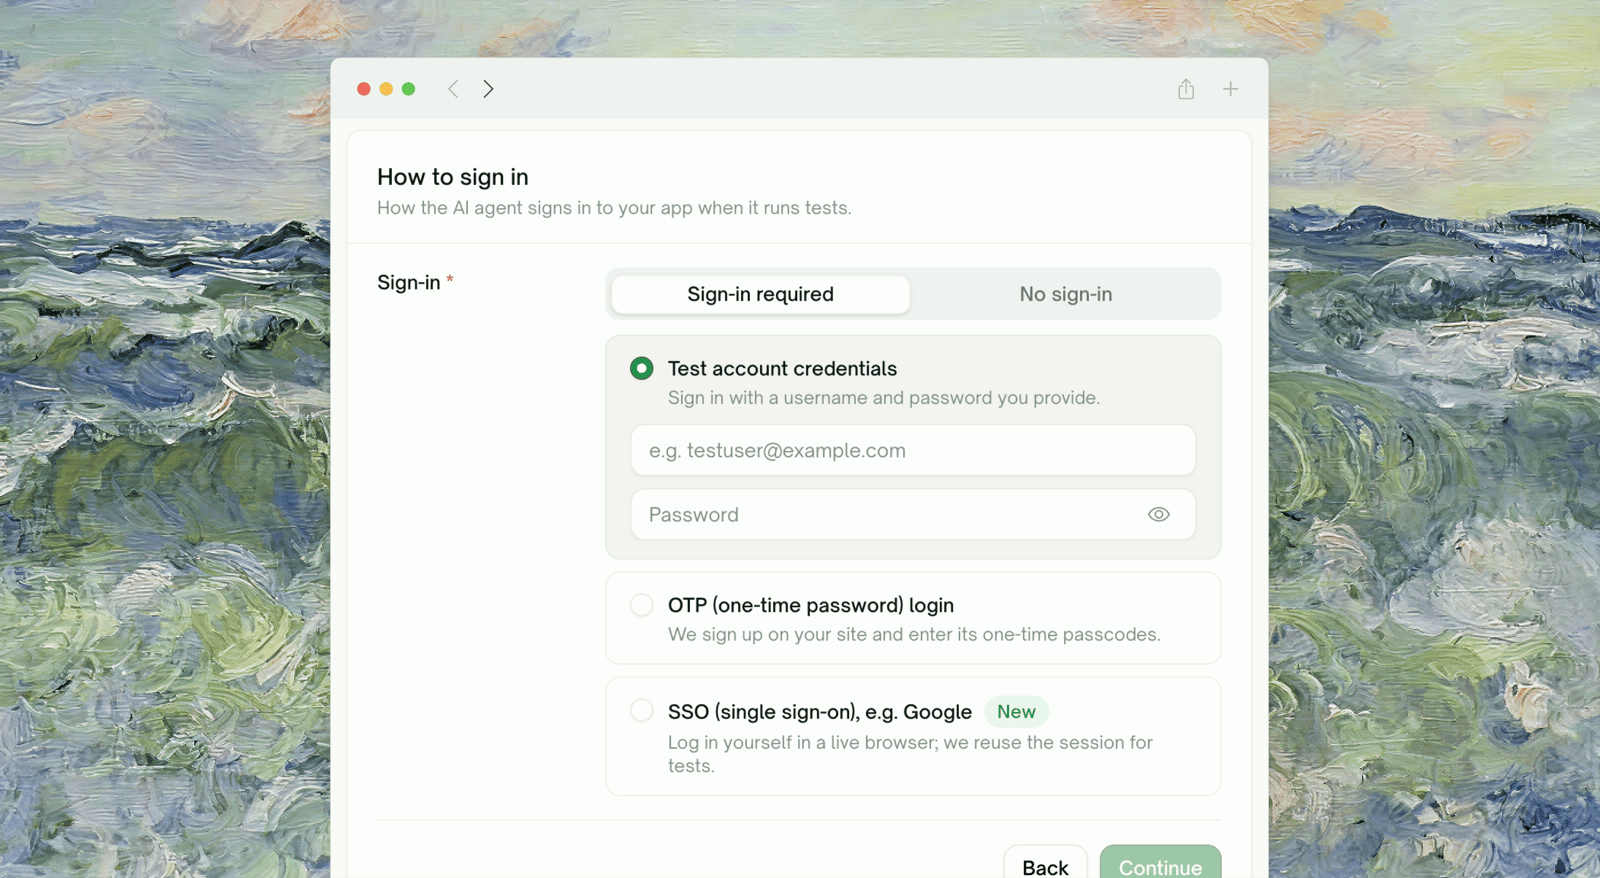
The sign-in section has two tabs. Choose No sign-in if the part of your app you want covered works without an account. Choose Sign-in required and three login methods appear as cards; pick the one that matches how users get into your app.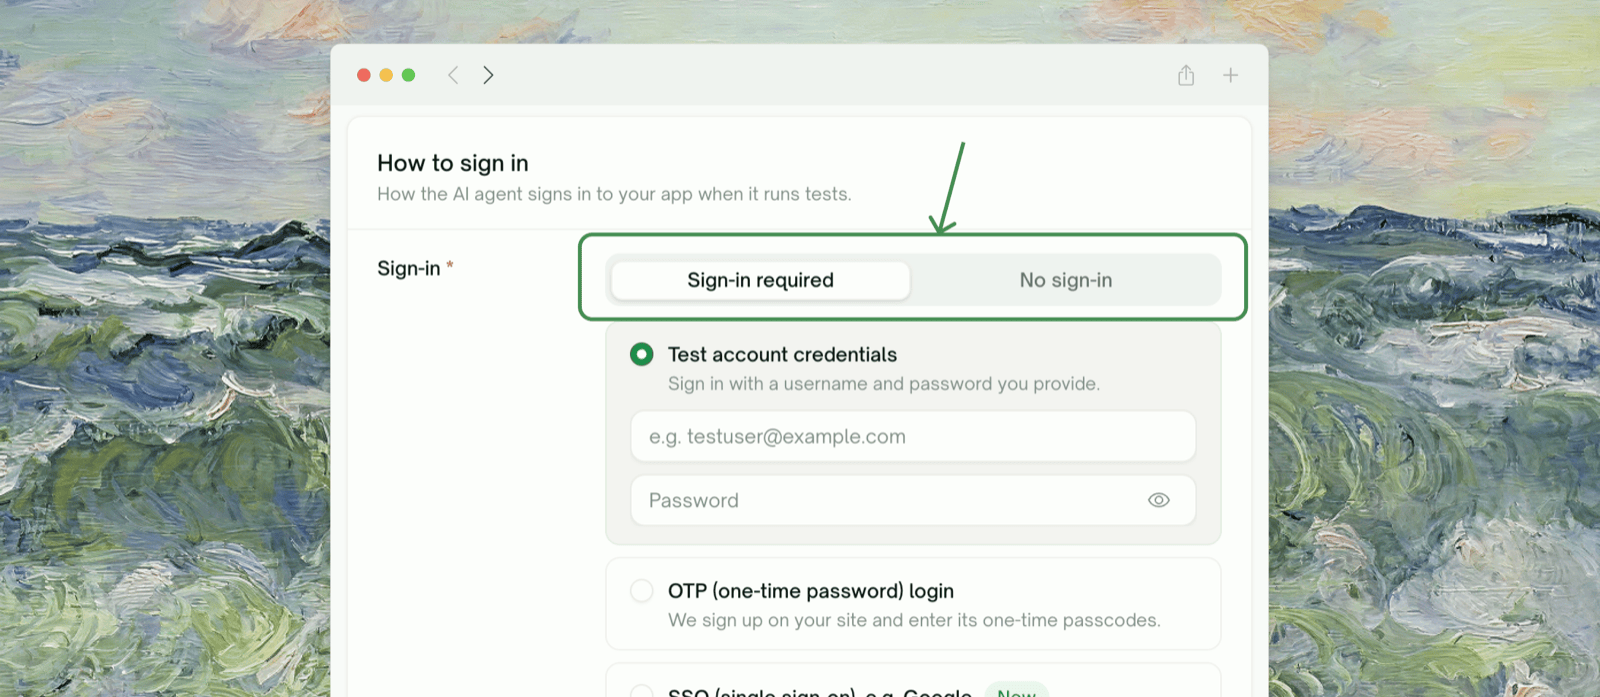
Method 1: Existing Test Account
You give TestSprite a username and password for an account you control. It signs in with them before exploring and before every run.
Configuration
1
Select Test account credentials
Choose Sign-in required, then pick the Test account credentials card.
2
Enter the credentials
3
Continue
TestSprite checks that both fields are filled, then uses them during exploration and every run.
Best for
- Standard email/username + password logins
- A dedicated test account you keep in a known state
- Staging environments with seeded accounts
Limitations
- Doesn’t handle one-time codes. If your login sends an email or SMS code after the password step, this method gets stuck at the code prompt. Use Method 2.
- Doesn’t handle SSO or social login. “Continue with Google” and similar logins can’t be driven with a username and password. Use Method 3.
Method 2: OTP (One-Time Password) Login
For apps that email or text a one-time code at signup or login. You provide nothing: TestSprite registers a dedicated test account with an email address and phone number it owns, receives the code your app sends, and enters it automatically.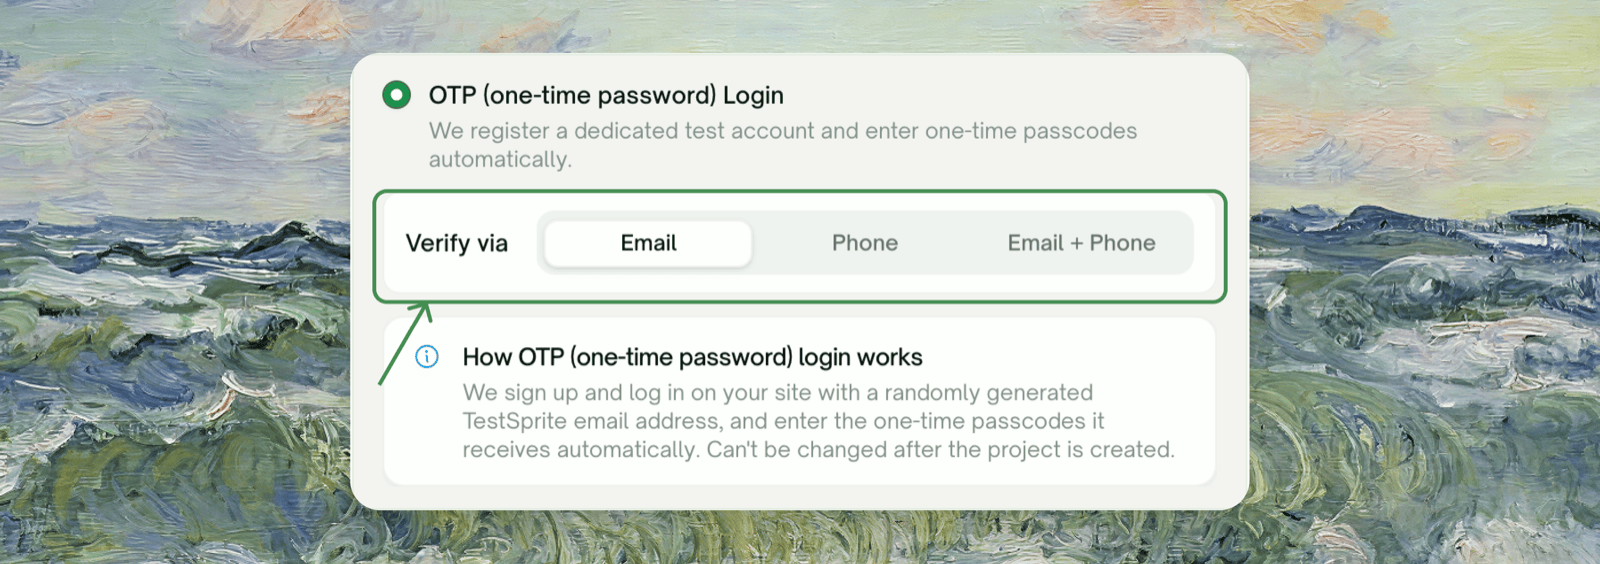
Configuration
1
Select OTP (one-time password) Login
Choose Sign-in required, then pick the OTP (one-time password) Login card.
2
Choose how your app verifies (Verify via)
3
Create the project
There are no credentials to type. When the project is created, TestSprite provisions the managed account and uses it from then on.
Best for
- Passwordless logins
- Signups that require email verification before you can proceed
- Two-factor flows where a code is the second factor
Limitations
- One managed account per environment. To test with a second managed account, add another environment.
- OTP logins in one environment run one at a time, so the managed inbox or phone doesn’t pick up the wrong code. A second login waits for the first, then reuses its session. This is why session reuse matters most for this method.
- It depends on your signup and login flow. It works wherever TestSprite’s testing agent can drive registration and code entry. If a flow can’t be completed (unusual signup gates, required fields it can’t guess, aggressive bot protection), the login fails loudly rather than running signed out. See Troubleshooting.
Method 3: SSO (Single Sign-On)
For SSO and social logins such as “Sign in with Google”, and for any login that blocks automated sign-in. TestSprite doesn’t automate these. Instead, it opens a real browser, you sign in yourself, and TestSprite records the session so later runs start signed in.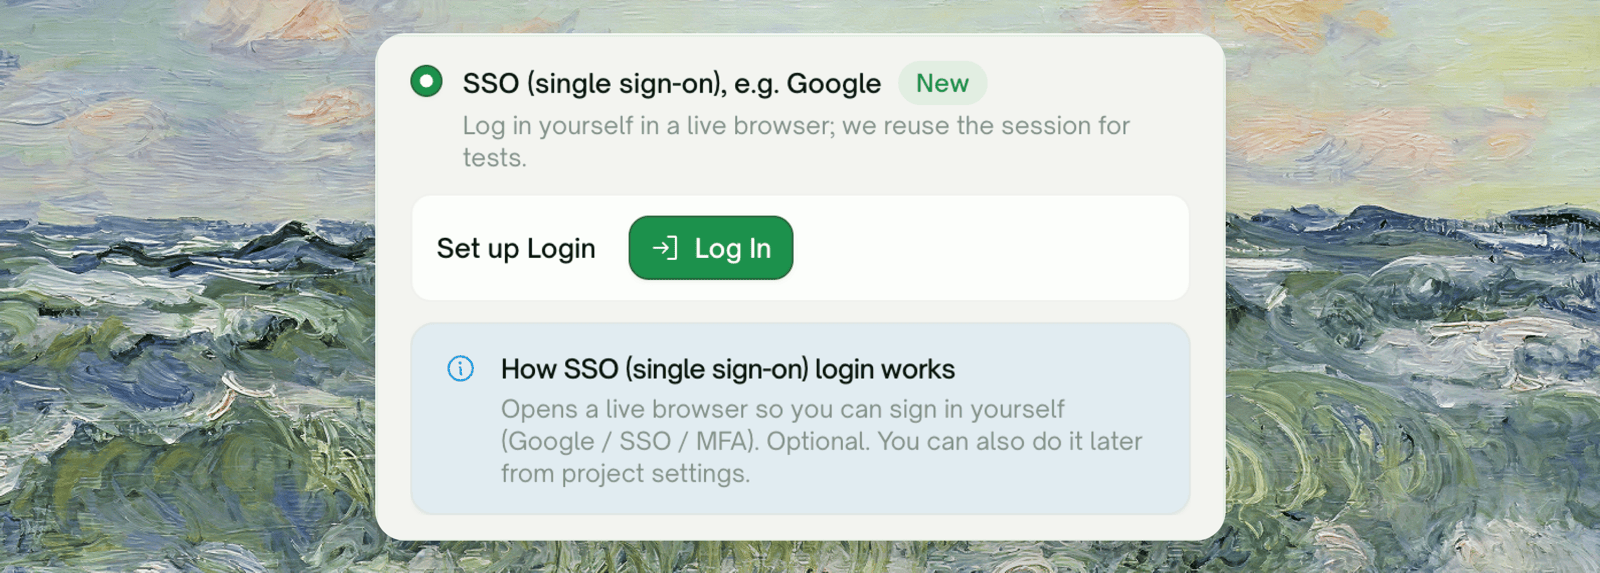
How it works
When you finish creating the project (or click “Log in” from environment settings later), a live browser opens inside the modal. You sign in as usual (for example, click “Continue with Google” and complete Google’s sign-in), then click I’ve finished logging in. TestSprite captures the signed-in session (cookies and local storage) to replay later.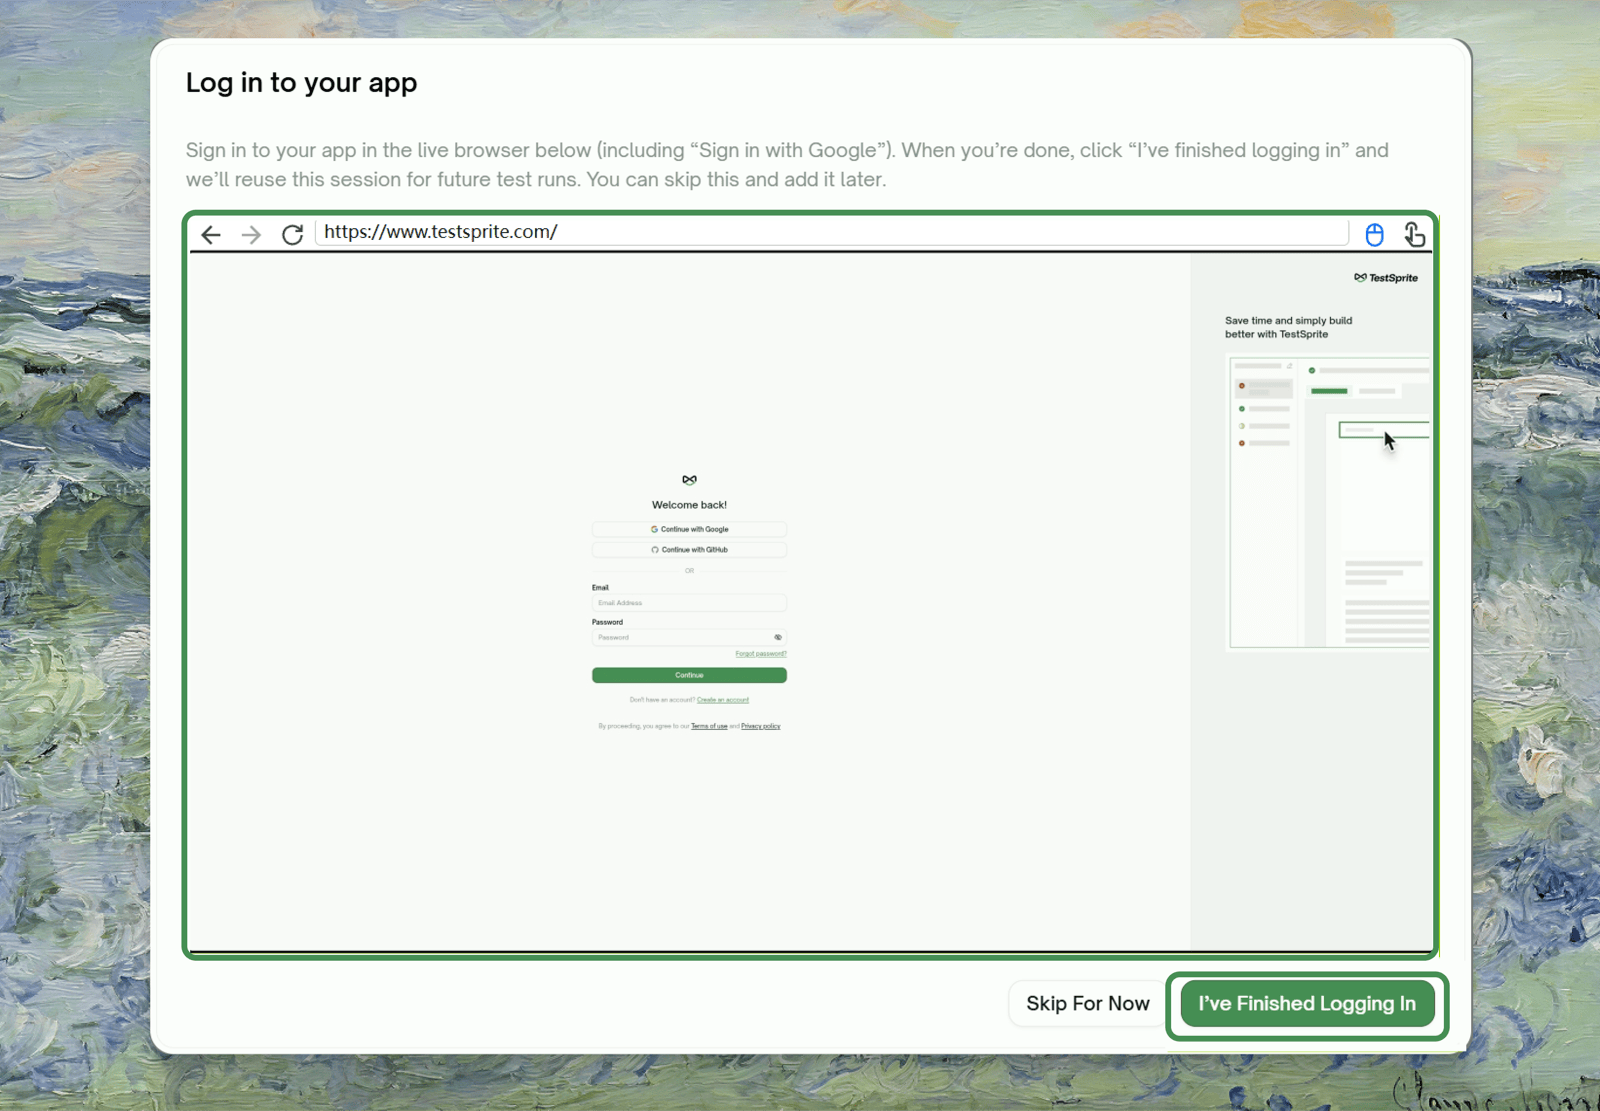
Configuration
1
Select SSO (single sign-on)
Choose Sign-in required, then pick the SSO (single sign-on), e.g. Google card. If the card isn’t there, the feature isn’t enabled for your account yet.
2
Finish creating the project
The Log in to your app modal opens with a live browser pointed at your app. You’ll see “Opening a live browser…” first.
3
Sign in yourself in the live browser
Complete the sign-in. You have up to about 15 minutes.
4
Click I've finished logging in
TestSprite captures the session and shows Login captured ✓.
Not ready to log in? Click Skip for now. The project is still created, and you can capture the session later from environment settings (see Re-authenticating). Until then, runs execute signed out.
Best for
- SSO and social logins, such as “Sign in with Google” (“Continue with Google”)
- Logins that block automated sign-in, for example with a CAPTCHA or bot detection
- Any sign-in that’s better completed by a human once than automated
Limitations
- Sessions expire. Your app’s own session lifetime is the ceiling. After that, log in again once (see Re-authenticating).
- It needs a human at capture time, once per session.
Prerequisites
- Your environment has a public URL the live browser can reach. Local URLs (
localhost, private IPs) can’t be reached from TestSprite’s browser.
Reusing a Login Session
Instead of signing in before every test, TestSprite can reuse a recent successful login. On the environment form (for OTP and manual-login environments), turn on Reuse Login Session and set a Reuse window in minutes. Within the window, runs start from the signed-in session; after it, TestSprite logs in fresh.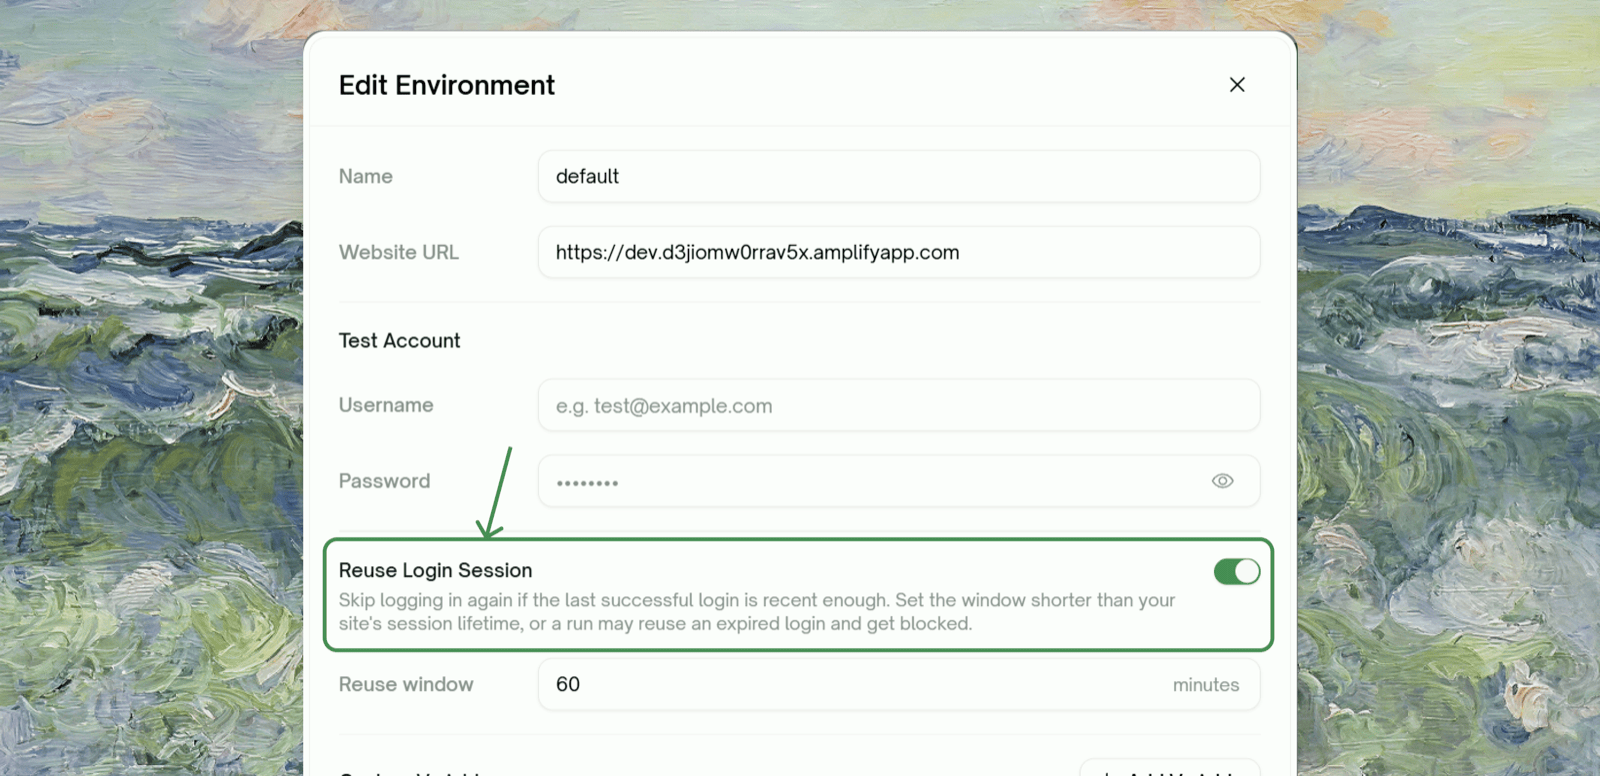
Multiple Test Accounts, Multiple Environments
Each account is one environment, and a project can have several. That’s how you cover different roles (admin vs. member) or tenants (org A vs. org B).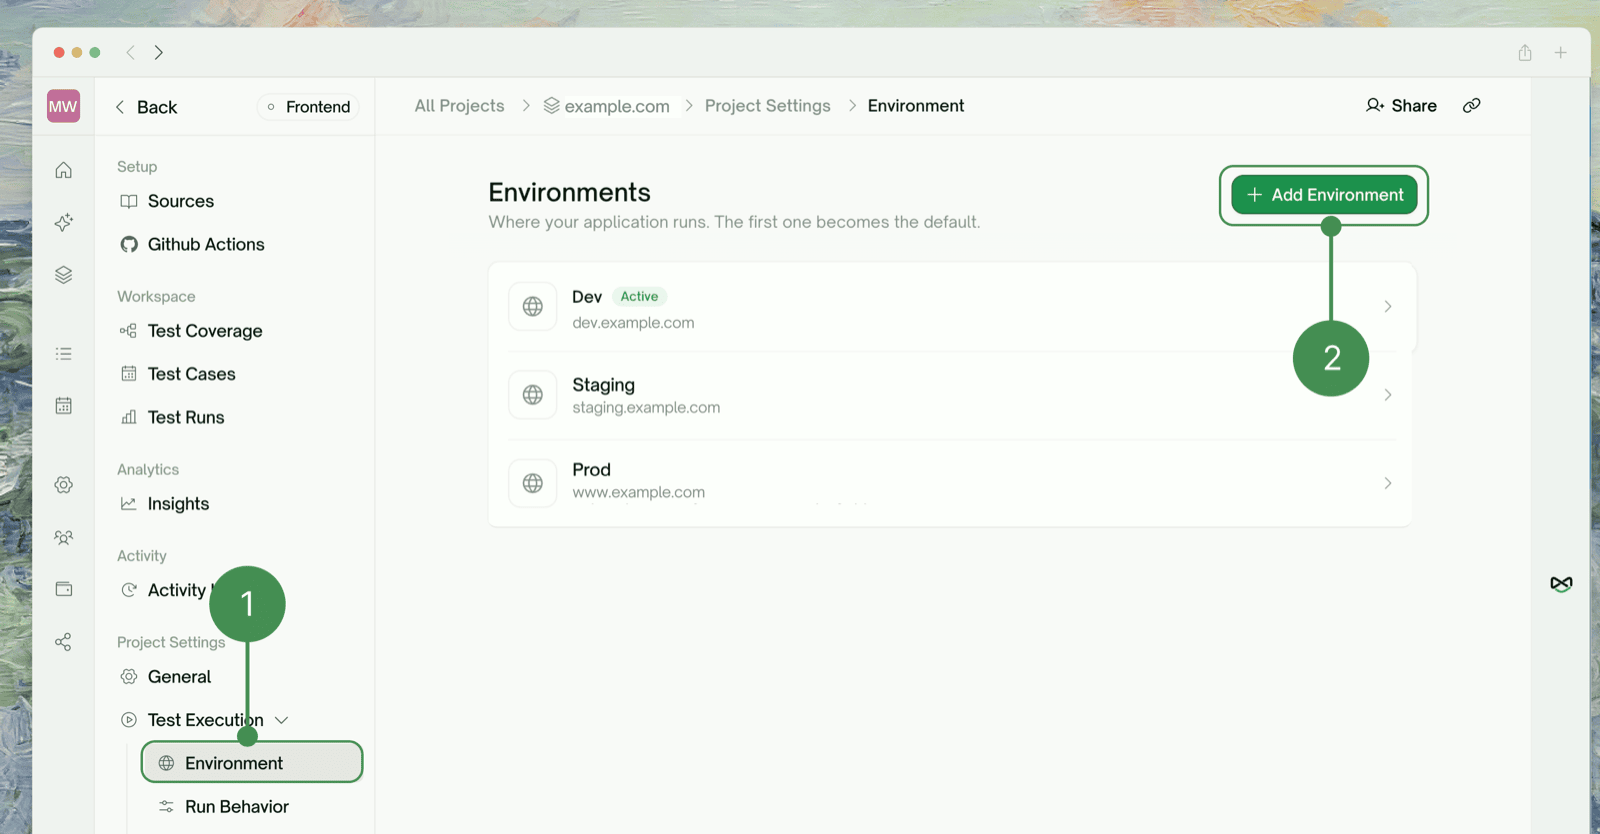
Adding Another Environment
1
Open the project's environments
Go to Project Settings → Test Execution → Environment. The default environment carries an Active badge.
2
Click Add Environment
Give it a Name (e.g.
Admin, Staging, Tenant B) and a Website URL, then set up its login the same way: Sign-in required plus one of the three methods.3
Point tests at the right environment
Runs use the Active environment by default. Use Set as Active to switch, or pin an environment on a test list or schedule.
Each environment holds exactly one test account: one username/password, one managed OTP account, or one recorded session. An OTP environment can’t be renamed, so name it correctly when you create it.
Re-authenticating an Expired Session (Method 3)
When a recorded SSO session expires, TestSprite tells you, and runs execute signed out until you refresh it.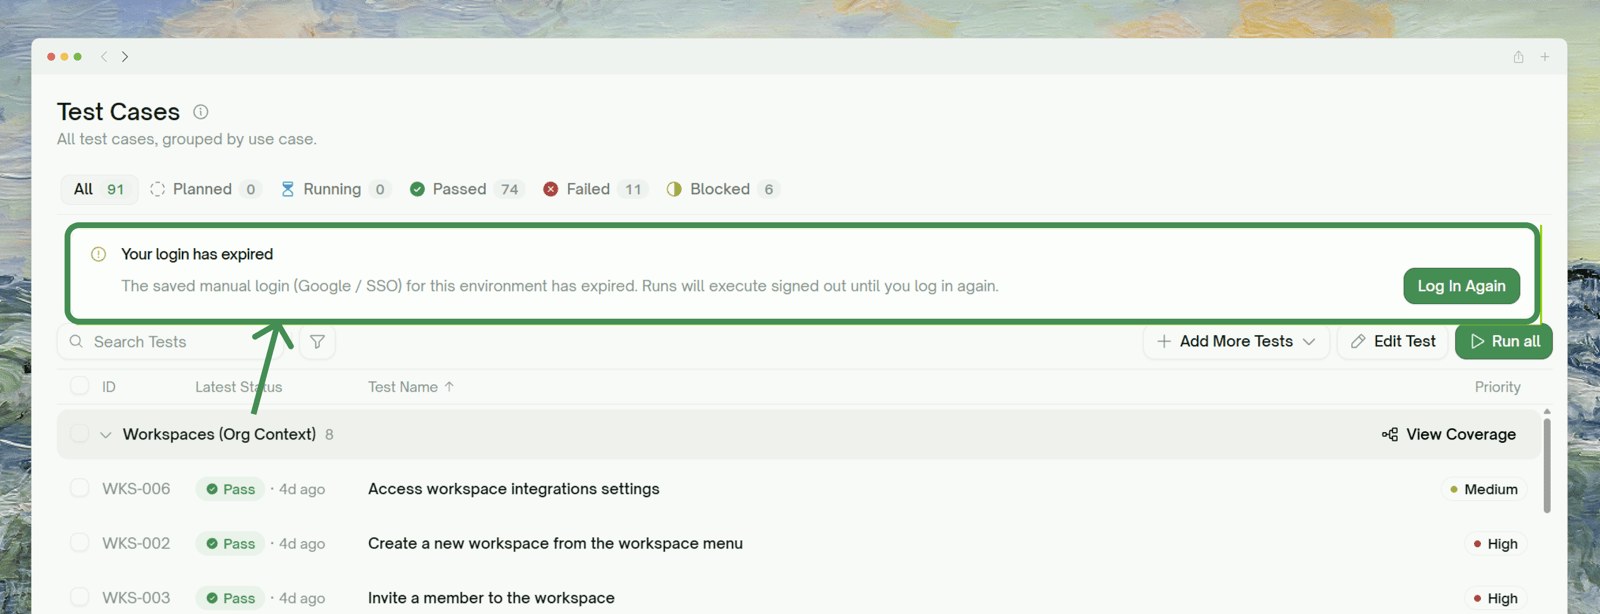
Log in again reopens the live browser so you can sign in and capture a fresh session.
Common Login Failures & Troubleshooting
My login sends a one-time code and Test account credentials gets stuck
My login sends a one-time code and Test account credentials gets stuck
Username and password alone can’t get past a code prompt. Recreate the project (or add an environment) with OTP (one-time password) Login.
I can't switch an existing project to OTP, or turn OTP off
I can't switch an existing project to OTP, or turn OTP off
OTP settings are locked at project creation. Create a new project or environment with the OTP settings you want.
Runs started failing after working fine (SSO project)
Runs started failing after working fine (SSO project)
The recorded session probably expired. Go to Project Settings → Test Execution → Environment, open the environment, and click Log in again on the Manual login (Google / SSO) card. If it happens often, shorten the reuse window.
The live browser won't open, or says the URL is unreachable
The live browser won't open, or says the URL is unreachable
The manual-login browser needs a publicly reachable URL;
localhost and private addresses can’t be opened from TestSprite’s cloud browser. Use a public staging URL, or set up the MCP server to test locally.An OTP run waited a while before starting
An OTP run waited a while before starting
OTP logins in one environment run one at a time, so a second run waits for the first login and then reuses its session. Turning on Reuse Login Session cuts down repeat logins.
Where to Go Next
UI Quickstart
The end-to-end walkthrough
Feature Exploration
How TestSprite uses your login to explore the app
Environments
Managing multiple environments (and accounts)
Auto-Auth (API)
The backend equivalent: token refresh for API tests